Files Gone on Drobo FS with OS X Lion? Get ’em back!

Using DroboFS and OSX Lion only to discover that your Drobo shares have no content!? Yikes! But fret not, you merely have a small corruption problem brought on by the firmware, and in moments you can force a rebuild of that database and all your files will be back safe, happy, and sound with no data loss. Here’s how.

I recently updated my DroboFS to firmware 1.2.0 and dashboard 2.0.3 when I switched to Lion, and while my volume mounted there was no data in it although the Drobo lights showed there was capacity, as did the Drobo Dashboard, and the health reports indicated everything was just fine.

I spoke with Drobo Tech Support that indicated this was a known problem they are actively addressing as high priority; the problem is with Lion and their firmware, and we can expect an updated firmware release.

What’s curious about this is that if one uses the Finder and mounts the Drobo drive with SMB, using smb://Drobo-FS/, the files are there. However afp://Drobo-FS.local/ and cifs://Drobo-FS.local/ mount but reveal nothing.

A detailed description of the problem is at the article entitled: “Missing” Data (AFP) and/or CNID DB Errors. This article then leads to a second one, but is only for the brave.

Using Dropbear (SSH) with Drobo FS to regenerate the AppleDB (CNID DB) has detailed steps for regenerating the apple database.

Walt’s More Verbose Directions

  1. Using the Drobo Dashboard login to your Drobo as Administrator.
  2. Unmount all shares.
  3. Under All Devices / Settings / Admin you’ll want to check the Enable DroboApps setting, which will mount a volume entitled DroboApps on your system.
  4. Download a copy of DropBear from the Drobo Apps page.
  5. Unzip this .zip file, resulting in instructions and a compressed dropbear.tgz file . Move the dropbear.tgz file to the root of the DroboApps directory.
  6. Restart the DroboFS by going to Capacity and Tools in the Dashboard, and selecting the Tools drop down on the right side, and selecting Restart. Or, just power off the unit physically for 20 seconds and then turn it back on.
  7. When Drobo restarts, go to the Dashboard and select All Devices / Settings… / Network. Note the IP address given to the device somewhere.
  8. From OS X’s Terminal enter the command ssh root@theIPaddressAbove
  9. The default password is root, unless you’ve used Dropbear before and followed the instructions within it.
  10. Enter the command ls /mnt/DroboFS/Shares to view a list of shares on the drive.
  11. Tech Support promises the following will not cause any data loss, but anytime you’re doing reconstruction you should always have a backup (if you don’t, question your backup policy), and double check before hitting return. For each share of yours listed above, enter the command: rm -r /mnt/DroboFS/Shares/yourShareNameHere/.AppleDB and press return. Note the period indicating it’s a hidden directory.
  12. Exit Terminal by entering exit.
  13. Using the Drobo Dashboard unmount all your shares, which should be just the DroboApps share at this point; this is under the All Devices / Shares and you just uncheck all the boxes.
  14. Restart the Drobo again (see above if you’ve already forgot how).
  15. And just as important restart any Macs connected to the Drobo.
  16. When the Drobo comes up, start the Dashboard, and test the mounts. They should be working.

TheFlip: files in the root directory? Come on….

Were you aware that the Flip video camera you have is writing stuff to your root directory?

I’m using a Flip UltraHD on OS X 10.6, and while I’m happy with the device, I’m not so happy with FlipShare, the software that comes with it.

While the device when mounted (/Volumes/FLIPVIDEO) has a DCIM directory that has the standard video subfolder(s) 100VIDEO. Inside there are all the .MP4 files that work as-is with the Mac.

While the FlipShare seems to be over kill for accessing files in this directory, I encourage anyone with this device to go open Terminal and take a peek at your root directory. Yes, your root directory.

$ ls /

You’ll find a file, /logFile.xsl there, which appears to take an XML file for FlipShare and convert it into an HTML file.

My question is this: Why is FlipShare installing user files to the root directory? This is a horrible practice, most certainly a violation of Apple recommendations, and it’s down right tasteless in Unix parlance.

Cisco, you know better than this. Come on…! Fix this.

Mysterious Copyright

This is clearly one of those things I did to myself as a good idea, then forgot about, only to be plagued by it later.

I noticed that all of my photographs on my camera were reporting a copyright with a 2009 year inside the exif data.

I’ve been unable to figure out where it was coming from, resorting to exiftool to remote it.

My natural thought was that perhaps it was some preference in a photo editing tool or a geospatial locator tool. But, no. Turns out I did it to myself.

The Canon EOS Utility has a nifty ability to include a value for the Copyright tag. And about a year ago when I tethered it to the computer, I must have noticed this and set it to some precanned value that includes the year.

It looked something like this:
Copyright (c) 2009 by Walt Stoneburner, All Rights Reserved.

And ever since then, my photos were stamped with that value. Which was fine, back in 2009.

Fixing the problem was as simple as tethering the camera again and firing up Canon EOS Utility. It also gave me an opportunity to update the firmware.

Strange copyright exif data: mystery solved.

WebCams on OS X

Lots of cool software exists for webcams on OS X.

OS X is capable of using USB and Firewire cameras, with perhaps the most famous being the iSight, second to the Built-in iSight of Apple’s laptops.

Use other cameras!
But it turns out you can use a lot of third party cameras using the Macam driver.

Use multiple cameras!
If you’re using multiple cameras at once, say for security monitoring, you’re going to want to take a look at SecuritySpy, which has motion detection, time lapse, and the ability to view from a remote browser, plus many other features.

Barcode Reader!
EvoBarcode will let you use your camera as a bar code reader.

Web Streaming!
EvoCam will let you stream multiple cameras and push images to servers.

Stop Motion Photographer!
iStopMotion will help you make your own stop motion movies.

Real-time Special Effects!
iGlasses will enhance and alter your video feeds.

iPhone 3GS Compass

So, if your game uses the compass and it’s being played in a moving vehicle, what happens….

The new iPhone 3GS has a compass in it, and most certainly it’s going to be used for precision game play at some point.

Then it dawned on me, one of the number one applications of the iPhone is to act as babysitter. You fire up a game and hand it to the kids in the back seat as you’re driving somewhere.

I’m wondering how this is gonna work as people try to play compass-enabled games while moving, say a car, bus, or train.

My first gut instinct is that initial QAing of games will happen seated, but their real use will be in an environment where there’s motion, and at that point this potential problem may start to get noticed. It may surface as bugs, where ‘the game’ did something unexpected.

As for me, I can’t wait to see how a few malicious sharp terms and exit ramps will affect future game play.

Found: The Best iPhone Development Book So Far

Want to write your own iPhone applications but Objective-C, XCode, Interface Builder, and the steep learning curve of Cocoa getting in the way? Have I found the book for you.

Warning: long and geeky post follows — iPhone wanna-be developers, read on!
Beginning iPhone Development - Exploring the iPhone SDKI’ve found it, finally, the best iPhone development book so far! Read on to see why.

Fairly recently, I decided to turn my attention to native iPhone application development, but I found the arena a little sparse when it comes to what I’d call good documentation.

For some perspective, I’m a software developer of 20+ years with background in Unix and Windows; I’m very well versed in C, C++, C#, and Java, among a good number of other higher-level languages, having produced a number of enterprise applications.

You’d think that picking up Objective-C and the Cocoa Touch frameworks would be a fairly simple task. However, the moment you step foot into the pool, you’re get a cold shock at how much you don’t know and it can feel daunting enough to want to retract back to familiar territory.

Don’t give up. It is easy.

Looking forward into the unknown presents a much more gloomy impression than when you’ve taken a few steps and looked back to see just how far you’ve come and in such a short period of time.

Here’s what’s happening: The Apple Frameworks represent a large and mature collection of some impressive code. The closest experience I’ve felt to it, and this is admittedly a horrible analogy, is Ruby on Rails.

With Rails, there’s so much going on by convention that you have to sling very little code to get impressive things to happen. This makes it hard to understand: there is no code to trace.

Same way with the Apple Foundation classes that are based on NeXTSTEP — a lot is handled for you, and often in new ways you might not have thought about because of limitations of other platforms, so that very little code is required to do something quite impressive. The problem is figuring out what that code is you’re supposed to write, and more importantly how’d you know to go about doing that in the first place. Hint: knowing the Foundation Framework is important to understanding the Cocoa Touch Framework.

This leaves one in the lurch that the sample code appears rather sparse, and the framework documentation overwhelming, with little guidance on how all the pieces fit together into a simple, cohesive whole. The problem is all too common.

My biggest gripe with many frameworks, especially Java and it’s auto-generated documentation, is that all you’re really presented with is a list of method signatures with very little discussion about what they do, purpose and limits to the input values, discussions of side effects, the importance of call order, and so forth. With other languages, you’re lucky if you can find the header file to include or the library file to link against. It’s all just expected that you somehow know this, and that doesn’t work when you’re learning a framework, though it’s fine if you just need a reference.

Apple’s online documentation is certainly comprehensive, but the reality is you’re going to be watching videos and reading tons of documentation, picking up crumbs of useful bits as you go. The cohesive moment of comprehension will come, but it will be a long and slow ride. You want something faster.

If you’re learning Objective-C at the same time, the ride is extra bumpy, because not only are there just a few language extensions sitting on top of C, but the ObjC library is actually doing some clever work that you want to know about, and this has additional implications because there’s a lot of convention going on as well. Further obscuring things is the fact that, due to historical reasons, the terminology you are most likely already familiar with doesn’t map nicely. A nice look under the hood solves this. Objective-C isn’t just some new keywords, it’s new application behavior.

What’s Wrong With Other iPhone Books At The Moment
As of early 2009, you’re going to find few iPhone books out there. Most of what exists is for the hacked version of the iPhone, and while that may even sound useful, the tearing apart of the SDK is rough and incomplete, not to mention the implementation to call is painful. This just isn’t applicable to the real world constraints of native mode development.

Think you can get by with a slightly out of date copy of a Cocoa book? Think again. The UIKit framework is just different enough that your approach needs to be slightly different. Tight, efficient, resource management becomes very important.

Also, unless you already know and understand Interface Builder, it can be a hard time following along when your book doesn’t match your software version. Apple keeps modifying Interface Builder, making it better, but the changes can come across as so dramatic, interface-wise, that to the new comer it looks like a totally different application each revision. Once you “get it” the sweeping changes are cognitively transparent. The iPhone SDK includes, you guessed it, a new XCode and Interface Builder.

What few modern iPhone books there are out there jump straight into a technical feast of SDK details, leaving the reader with a learning curve that’s as vertical as a brick wall.

What’s needed is a book that introduces only what you need to know, when you need to know it, explaining tips and tricks along the way, delving into the philosophies of why things are the way they are, what the developers were thinking, how the frameworks are structured, what the conventions are, and when those conventions aren’t followed. And, instead of showing you the end solution all refactored into a neat package, take the long way, when needed, to introduce you to what’s going on and then evolve into the optimal solution.

I’ve Found Such A Book!
The book, by Apress, is called Beginning iPhone Development – Exploring the iPhone SDK by Dave Mark and Jeff LaMarche. This book is about the fundamental concepts you need to understand in order to make the frameworks do their magic.

Its tutorials are very well constructed, easy to follow, and are specifically designed to teach the framework in such a way as you understand what’s going on and learn to fish for yourself.

This is in stark contrast to substandard books that merely cover a framework’s capabilities with cut’n’paste examples that have little bearing to real applications. This alone gives is five out of five stars by my standards.

My only complaint is a minor nit that there are a small handful of typos, and unfortunately, they happen in the code examples. However, they’re glaring, and you won’t get tripped up by them. (For example, on page 85, the tutorial is about UIImage. And, UIImage appears four times in a six line sample. The first one, however, says “jmUIImage” and the indentation is off. It looks like a macro expansion, a note, or the mangled initials of one of the authors. The code won’t compile with it, and it’s obvious from context what it should be.) To me, this is forgivable. Especially since it’s rare.
Tagging 1430216263I want to show you something.

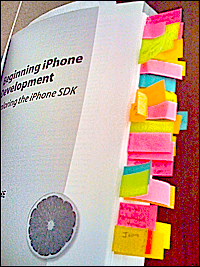
I have a habit of tagging my books when I find an exceptional piece of information that I haven’t found elsewhere. I give a book high marks if it earns somewhere between three to seven tags, as the majority of my collection never gets any tags. Tagging, for me, is not note taking — it’s rare event.

I think the picture speaks for itself.

For Example…
So, at this point, I present for my own edification and future reference, some of that tagged content. Who knows, maybe something you see here might just get you traction on the learning curve.

– In Objective-C, colons are a legal character of the method identifier, they are not syntactic sugar.
– Even though a number of macros translate to nothing, void, zero, or null under the hood, their presence provides important hinting for data types and method calls.
– The NIB’s File’s Owner is a place holder for the class that loaded the NIB file.
– The NIB’s First Responder is the object the user is currently interacting with.
– The application icon is a 57×57 .png file, see Info.plist’s Icon File.
– The iPhone specially optimizes .png files so this is the best format.
– Reset the iPhone Simulator by deleting its directory from ~/Library/Application Support
– You want to use @property (retain, nonatomic) as often as possible.
– Interface Builder uses your defined accessors to properties, which use retain; that means you do need to deallocate Interface Builder objects, even if you didn’t instantiate them.
– There are four control states on a control, often you want UIControlStateNormal.
– Learn to use retain/release, there is no garbage collecting on the iPhone.
– It’s better to init/release than using factory methods; factories use autorelease pools, and while this will work, it often keeps resources around longer than you intend — avoid autorelease pools.
– Hog too many resources, whether CPU or memory, and the phone will reboot.
– Everything from UIApplication on down will fire messages to Delegate objects at certain well-defined times, you need to learn what these times are and what messages are sent; it’s not just subclass avoidance.
– You can Option-Click on a class or interface name in XCode and go right to the documentation.
– You can press ESC to cause auto complete to happen immediately.
– Command-equal_sign will size a control to fit.
– When you’ve got a lot of control hierarchies going on, use the View Mode button to see them as a list.
– Scaling an image takes computational overhead, avoid if you can.
– Set the Alpha slider to 1.0 in order to optimize the drawing sequence, it skips looking at the underlying background and factoring it in — it applies to the image drawn.
– Also set the Opaque checkbox in order to optimize the drawing sequence, it skips drawing the underlying background for the parts where the image is transparent.
– The Tag control allows you to assign a numerical identifier to controls to locate them later.
– You need to handle the Did End on Exit event in order to make the keyboard go away.
– You may also need a huge, invisible, custom button as well to make the keyboard go away.
– In XCode, use Option-Command-up_arrow to toggle between a header and its source file.
– In the Interface Builder, move the cursor over a view and hold down Option to see how many pixels there are between the item and its superview.
– Option-dragging a control in Interface Builder makes a copy.
– Nifty buttons are actually stretchable images, and Apple has buried a ton of them free for your use in the UICatalog sample code on their site.
– There are three different ways to handle layouts when rotation happens: autosize, reposition, and view swapping.
– The rotation callback passes you the orientation the phone came from, you need to use other means to get the current orientation.
– If you want to use Core Graphics, for things like view transitions, you need to link the framework into your application.
– Some frameworks, like Core Graphics, have one version for the iPhone hardware and one version for the iPhone Simulator.
– If you use the correct parameters, XCode’s build process can play games with the path and always target the right framework (use Relative to Current SDK, and do not select Copy items).
– Right-click the Resources folder and use Add / Existing Frameworks… to do this process in a safe way.
– If a view isn’t shown, it’s superview is nil.

…there’s plenty more, but you get the idea. The book is jammed with all kinds of useful things to someone who is new to iPhone development. This presentation of material makes the learning curve very approachable.

And, once over that hurdle, all those other books that I said were problematic suddenly make a whole lot of sense.

This book is the best first step I’ve seen in the journey to writing iPhone applications. Period.

Walt gives “Beginning iPhone Development” two thumbs up, five stars our of five starts, and a head nod of appreciation to the authors. Well done, guys. Well done.


Changes at the Apple Store – For the Better!

Apple has changed the Genius Bar policies and procedures. INCREDIBLE IMPROVEMENTS!

Anyone who’s been to an Apple Store, especially the one in Tysons Corner, VA, knows that Apple is experiencing some serious growth pains. Yes, as predicted, more and more people are starting to adopt Apple hardware and software and the cost/benefit factor becomes more apparent. The hardware is not that much more expensive, and if you take in to account all the stuff you get and all the stuff you don’t need to buy, it’s actually a pretty sweet deal for the total cost of ownership. Vista didn’t win any favors, Windows 7 is invoking similar fear, and Apple’s forth coming Snow Leopard looks like it’s going to be dealing a death blow. Meanwhile the number of ways to run Windows applications on a Mac, even the graphically intensive ones, are climbing — that a Mac won’t run Windows software is just not true.

Where Apple dropped the ball was the in-store support. If you walked into the store, all appointments were filled. Even if you registered in advance, you couldn’t be seen before hand. And turns were taken in the ordered registered — which meant if you had the identical problem as the person at the counter, and someone required 45 minutes of training in front of you, you had to wait. In short, it was awful and you had resort to gaming the system to get seen when scheduled.

As it turned out, my iPhone started wonking out on me when it came to WiFi. My connections would drop, and with the last firmware update, my WiFi connection would drop seconds after being established. Manually cycling WiFi, power cycling, rebooting, and even firmware reloading did not solve the problem. All I could use was Edge, even when someone next to me could see the network access point at full strength on their iPhone.

I loathed the idea of going in to the Apple Store with a real hardware problem, which would require seeing a Genius, especially a shopping day or so before Christmas Eve.

Unbeknownst to me, Apple had made substantial improvements in customer service, the likes of which exceeded all my hopes and expectations. Check this out!

The moment I crossed the store threshold, I was greeted with “Welcome to the Apple Store, is there anything I can help you with?”

“Uh, no, I’m here for a Genius Bar appointment, and I’m an hour ahead of schedule.”

“No problem sir, I’ll register you’re in-store, so head on over to the bar now, and we’ll see if they can take you early.”

Huh? Normally the Genius Bar has a crowd around it with very frustrated people, and four to six gurus working madly. However, as I looked over there were only two, and tons of empty stools, and zero crowd waiting. Meanwhile, the store looked busier than I have ever seen it.

I go over and take a seat. Again, I’m greeted, they ask my name, and they say they see me as appointment number 9. Usually that means that I can expect an hour and a half wait.

However, I’m watching as the two people there are taking cases, and the moment they require some hardware restore or check, they start the automated job and immediately start taking the next person. They’re working concurrently, and they are cranking through the list.

Less than five minutes later, it’s my turn.

“What seems to be the problem?”

As I’m describing it, I notice he’s typing. So I pause and ask what he’s doing.

He tells me, “I’m setting up an order in the computer to replace your phone with a new one. I’m going to flash the firmware, and if that solves it, I’ll press cancel and give you your phone back. If it doesn’t, I’ll hit submit. Either way, you’ll have a working phone in five minutes or less.”

My mouth drops.

“While I do this, do you mind if I take another customer?”

“Uh, no, of course not.” And he calls the next person in line. I’m shocked. I’m impressed. I’m please. And everyone at the Genius Bar starts socializing with one another. It’s turning into a little party.

As he’s talking to the other customer, he’s pulled out a box, moved the SIM card from my phone into the new one, and pushes the new phone and the paper work my direction. I sign it, and he says to me, “You’re all set. And 15 minutes before your appointment was supposed to start.”

That couldn’t be right, I was there an hour early. Looks like they bumped me up in line a few times when “Last call for Mr. Noshow” was hollered out.

I did get to talk with the Genius, and he stated that Apple now allowed them to take people early, as well as work concurrently, and group similar cases together. It was clear that this removed all congestion and put them ahead of the game.

For as I was talking with him, a floor person came over and said “I have a woman on hold, she was wondering if you could do a walk-in.” The Genius spread his arms and said, “absolutely, I have nothing but real-estate” and gestured at the empty bar.

The service was friendly, prompt, and I’d give it six stars on a five star scale.

Walt gives the new Apple policies and procedures at the Genius Bar two thumbs up!

Garmin WebUpdater

I own a Garmin GPSmap 60CSx in order to geoencode my photography using HoudahGeo.

Garmin now has a means up updating the firmware in their GPSs by using a WebUpdater, of which I use the version for the Mac.

I Got Myself Into Trouble
In retrospect, I got myself into trouble by starting the program, it failed to detect the GPS, to which I turn on the GPS, and plugged it into the USB port. While the WebUpdater saw the device and went to update, it stayed in the “Erasing… Do Not Unplug” state for about two hours before I got brave.

What I Did, And Boy Was I Lucky
I couldn’t cancel. I couldn’t Quit. So I had to Force Quite by using Command-Option-Escape, that at least got WebUpdater to stop. The GPS was still stating “Loader Loading…” when I pulled the USB, and when that didn’t change anything, I turned off the power to it. I wasn’t so sure I was going to see much of anything when I powered it back on.

I got lucky. I turn the power back on and I was still at the old revision. Then plugged in the USB to the computer. Then started WebUpdater, which again noticed the GPS version, downloaded the firmware again, and had no problems installing it. Seems doing things in this order works just fine.

My Plans If I Was Unlucky
Over on Bill Turner’s site, he’s written an article about Fixing a Dead Garmin GPSMap 60CSx. It seems he’s learned holding down the Power Button and the Up Arrow at the same time while starting the WebUpdater software (I think he has three hands to pull this off), he’s able to force the GPS to identify itself to the updater. Problem is, according to his instructions, you have to keep holding down these button chord during the update; some comments on the blog state it isn’t necessary, and there’ve been mixed results as to whether this works universally or not.

I’m not sure I would have had the bravery to just go killing processes plain outright, but since Bill did such a nice job of providing an alternative, I felt it was worth the risk — even if I didn’t have to go that route. Thanks Bill for blogging your GPS recovery notes.

Aurora Feint: Recovered

For some unexplained reason, Aurora Feint would no longer start on my iPhone. Starting the game exited back to the main menu. Here’s how I restored the game and recovered my previous game play.

Aurora Feint won’t start.

I’ve been playing Aurora Feint on the iPhone, and all of the sudden, it quit working. The game, not the phone. I’d go to start it, and then get returned to the main menu. Seems other people were having a similar problem. Some were lucky to get the game working again, others lost data.

Here’s how I recovered mine, preserving game play. Your mileage may vary.

0. Back up your iPhones by syncing it with iTunes.
1. Hold down the Aurora Feint button until the icons jiggle.
2. Press the (X) delete button over the Aurora Feint icon.
3. Acknowledge that you’re deleting the game and that all game files may be lost.
4. Hold down the power button on the phone, slide to Power Off.
5. Power phone back on.
6. Immediately go into App Store, select Search, enter Aurora Feint, and Install.
7. Acknowledge dialog that you already purchased this item and want to install again.
8. Let the game download and install.
9. Again, hold down the power button on the phone, slide to Power Off.
10. Power phone back on. For me the phone went through a very long boot cycle with the Apple logo.
11. Press the Aurora Feint icon to start the game.
12. For me, the screen went blank and stayed there — tap the center of the screen, movie controls appeared.
13. Unpause movie intro and let play to completion.
14. After a moment, I was returned to the map.

I’ve found that I always have the best of luck restoring the game when I’m at the map. Exiting while at the character page or in the middle of a mining activity does work, but not always; this causes the game to be fussy and exit prematurely to the main screen after start (unless you can intercept with a tap in the upper right corner).

Good luck.