In addition to capturing the perfect image and having the perfect lighting, you also need to know how to do photographic retouching.
You may even know about Raw Developer, to eek out what your photo editing software can’t.
![]() You might even know about the Pantone Huey Pro, which is the dual-monitor color calibration device.
You might even know about the Pantone Huey Pro, which is the dual-monitor color calibration device.
Forget everything you know or think you know, here are the sources you need for high-end professional photo retouching!
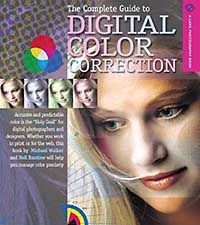
Color Correction
A good photo has to take into account its color space, and it turns out the simple color wheel model is actually fairly simplistic. A color space looks more like a stretched and distorted multi-dimensional field. By deliberately contorting the color space, it’s possible to do everything from white-balance to invoke moods to increasing contrast.
Additionally, your camera has the ability to pick up more detail that you’re able to discern or your monitor can display. By stretching and twisting the color space, you can draw out more details in areas where you need it.
Curves effectively do a translation, but instead of linear relationship, the change can be dramatic in some places, less so in others. Think of it like a color spectrum on a rubber band, you can stretch portions of it.
The eye dropper tools in the Curves dialog help identify what should be considered white, what should be considered midtone, and what should be considered black for transformation. It may come as a surprise that it might not be ideal to have a pure black or a pure white.
Mastery of Curves allows you to deal with under exposed, over exposed, and color casted images. With a well exposed picture, it will help make the subject pop. It also affords some very clever use of creative coloring. And let’s not forget controlled desaturation can lead to many splendid images.
Once you learn how to really use Curves, you’ll have no need for Levels.
Certain color-space models play off of different strengths. Color need not be RGB.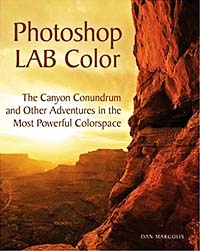
Print, for instance, looks great when CMYK is used.
It turns out that for drawing out detail, LAB color space makes a world of difference.
LAB space is magical because it puts the luminance on it’s own channel. The tradeoff is that red/green become opposites on the ‘a’ channel, and blue/yellow become opposites on the ‘b’ channel. This works well, as often it’s the brightness you want to affect without washing out the color. For instance, LAB mode can remove unwanted fog and haze, magically pulling color out of seemingly nowhere.
Additionally, the Unsharp Mask can be applied to just the luminosity channel, pulling out extra details. If there’s noise in an RGB’s blue channel, one can covert to LAB, apply the Dust’n’Scratches filter to the B channel, and convert back. Blurring A and B will hide imperfections.
The A and B channels can be used to accent color. And if an image has an unwanted color cast, moving the curve out of A’s or B’s center point removes it.
LAB also has another amazing use: getting amazing selection masks from the channels.
Color Enhancement
Scott Kelby, a Photoshop guru, has identified that there’s really only seven steps needed to really push an image to the limits. This can make a horrible picture acceptable, and a well exposed image astounding.
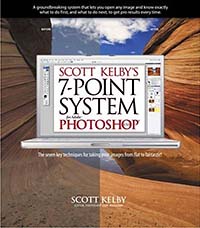
- Use Open the file in RAW mode, even if it’s a JPEG, and pre-process there.
Fix the white balance, and then do things like warm it up. Fix the exposure and twiddle the details. Information that’s clipped can be brought back into the color space. - Perform the Curves adjustments.
Bring out detail. - Adjust the Shadows and Highlights.
Pull out more detail, and set the mood. Good contrast makes a dramatic photo. - Paint with light.
Layers, gradients, and layer blending can simulate camera filters. A neutral density, for instance, can bring out the blues in your skies. In a more controlled sense, this is non-destructive dodging and burning. - Channels Adjustments using LAB color space.
By applying an image to itself with soft light, in LAB mode this produces aesthetic contrasts. - Use Layer Blends and Layer Masks.
Often the whole image won’t need uniform changes, this step brings all the elements together. - Sharpening with the Unsharp Mask and fading the Luminosity afterward.
Extra sharpness can be pulled out to provide what looks like a really in focus image. Doing it this way removes color halos that may appear.
Professional Retouching
Most retouching instructions inadvertently make a model’s skin look like plastic. They focus on the Gaussian Blur filter, screening layers, and use the Clone tool, and the Spot Heal Brush. This might be acceptable for small web images, assuming you want that look.
It’s not what the professional do.
Why not? Those activities destroy information in the image. That means the image looks fake and retouched when viewed up close or when it appears in print.
To do things right, you need a solid command of color spaces, the Healing Brush, the History Brush, Dodge/Burn brush, Warp/Liquify tools, and Unsharp Mask. Most changes are made with Adjustment Layers, so the image is actually a composite of small, controlled alterations. This is time consuming and can be tedious if you don’t know the numerous shortcuts of your post-processing application.
To make a clean image, one uses the Healing Brush with sampling from all over the image. Reshaping parts of an image requires the Liquify tool, and to alter the whole image the Warp tool is used. These activities can damage data, which is why after using them cleanup with the History Brush is necessary. The goal is to preserve detail and remove imperfections.
Since the magic of photography is in capturing the light, not the subject, having controlled contrast makes an image stand out from the rest. What makes a good professional photo retoucher isn’t the blemish removal or pushing of pixels, it’s the re-sculpting of the image in 3D.
In this context, I’m not talking about modeling tools like Poser, Blender, Animation:Master, or DAZ:3D. No, I’m talking about the illusion of depth created with shadows and light.
Face Painters are do this to reshape the face, using smooth gradient blending and edges to create fantastic illusions. The dodge and burn tools, along with an decent understanding of human anatomy, will let you get a model closer to that perfect body.
The insight comes when you realize things that are further away are darker, and things that are closer are lighter. By performing slight emphasis on naturally falling light, shadow, and edges, it’s possible to enhance the perceived depth of the photo’s subject. By adding or removing light, it’s possible to alter the shape of the subject in very flattering ways that are not perceptible unless you compare the image to the original.
Total reconstruction is possible when sampling can be used to build the right textures, hue and saturation can set the right colors, and dodging and burning can create the right shadows to convey a shape or edge.
Bringing It All Together
The name of the game is contrast and sharpness, and with the resources above, you’ll be able to produce some jaw dropping images.
Mind you, there’s no magical automated formula. One image can take literally hours, but the results are worth it.
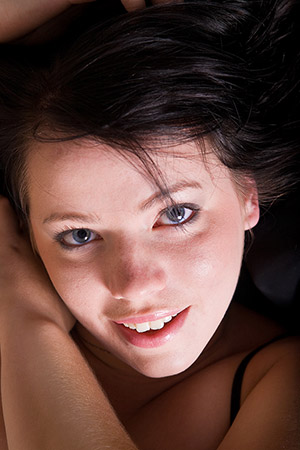
Photo by Walt Stoneburner